

Car Washing and Cleaning Procedures and Top Tips
23rd Jul 2024
Below is a great guide provided by the very knowledgeable guys at Auto Finesse.
This will help the novice and accomplished detailers with your basic washing and cleaning procedures and help you pick the right products for the job!
WHEELS & TYRES
Every detail (with the exception of those that include deep-cleaning the engine bay or chassis) begins with cleaning the wheels and tyres, simply because this tends to be the dirtiest area of any vehicle. By cleaning the wheels and tyres first, we eliminate the risk of premature drying and leaving watermarks on other more sensitive parts of the vehicle.
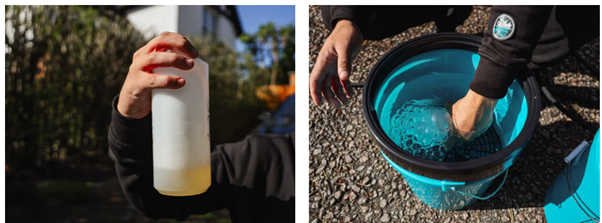
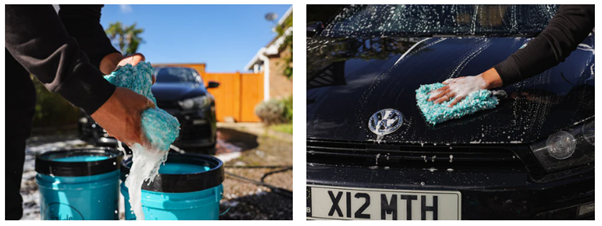
The first stage is product preparation, and we begin by filling a Detailing Bucket three-quarters full with plain water, and then adding 2-3 two capfuls of Revolution Wheel Soap. To ensure that we get sufficient suds and an active foam from our shampoo solution, we fill the remaining quarter using our pressure washer lance.
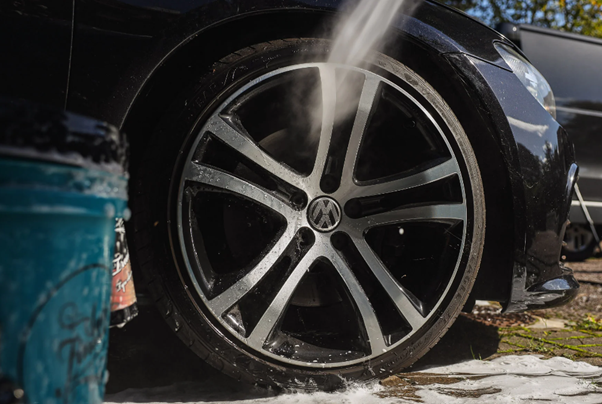
We clean wheels one at a time, and before making any contact with any cleaning agent, we rinse the wheel and tyre thoroughly. This is immediately followed by flushing out the inner arches, before moving back to the wheel for a final rinse down.
The reason we rinse each wheel for a second time (after
completing the inner arches) is because any heavy grime flushed out from
underneath will inevitably drop down onto the wheels and tyres, particularly
inside the barrels. The whole process is specifically designed to remove any
heavy, loose contamination, saving your cleaning agents for where they're most
needed. This measure prevents you from wasting your products on contamination
that can easily be removed without them.
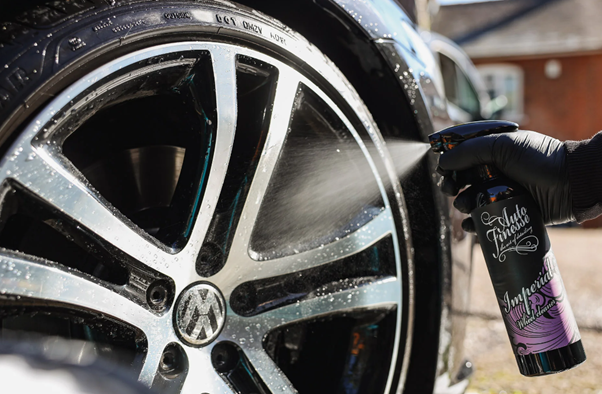
The next process is where your wheel cleaners come in. In our case we have
reasonably-tough, clear-coated OEM wheels, so we'll be using Imperial Wheel
Cleaner and brushing it in using our Revolution Wheel Soap solution.
This stage not only makes use of the cleaning power of both products for
intense grime and brake dust removal, but also utilises the lubrication
properties of Revolution to help potentially harmful particles slip and slide
freely over, and off, the surface.
For the most sensitive finishes - such as bare metal and unprotected chrome wheels - Revolution can be used as the sole cleaning agent.
Apply Imperial liberally to the whole wheel, being sure to get plenty inside the barrels. Allow to dwell without letting the solution dry out, for around 2-4 minutes. This will allow the product to get to work breaking the bonds of any baked-on contamination, lifting and encapsulating harmful particles safely in the solution.
Once the dwelling is complete, we can agitate the solution by brushing in with our Revolution solution. Here the agitation isn't so much to physically scrub away the grime, but to ensure maximum contact with all areas, and to refresh any spent solution with fresh product.
Many cleaning products that are safe to use on cars - including those that we use on wheels - are classed as aqueous cleaning agents, meaning that they use a combination of water molecules and special cleaning molecules called surfactants to physically pull particles away from surfaces. Once broken free, the surfactants surround them, suspending them safely in the cleaning solution, allowing them to be rinsed away. This mechanism takes place on a microscopic level and there's only so much grime that each of the millions of surfactant molecules can encapsulate before that portion of the solution is essentially full up. This is what we mean when we say the solution is spent. Agitation makes your cleaning products more effective by moving away the spent solution and replenishing the area with fresh solution to work on any grime that's left over. This is why dirtier surfaces tend to require more product and more agitation.
With wheels, we start the agitation process on the barrels and between the spokes using a Barrel Brush, which has been specifically designed to slip in and make maximum contact with these areas. Dip your barrel brush into the Revolution solution and agitate.
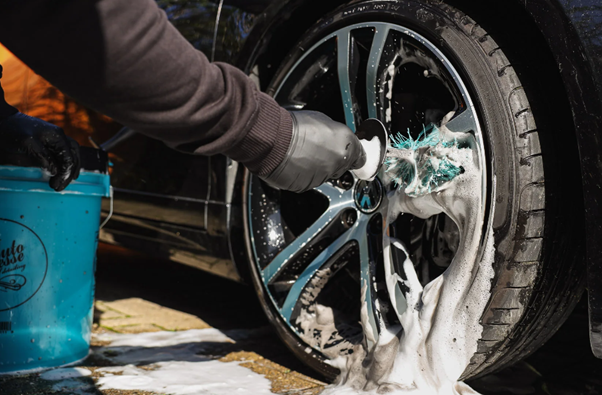
Once every part of the barrel has been agitated, we move on
to using a dedicated wash mitt to agitate our solution into the faces and
around the spokes. When we say a "dedicated' wash mitt, it means that we
always keep any mitt used on wheels separate to the mitt we use to contact wash
later. This is to prevent the risk of transferring harmful particles, such as
grit and brake dust, to the more sensitive areas of the vehicle.
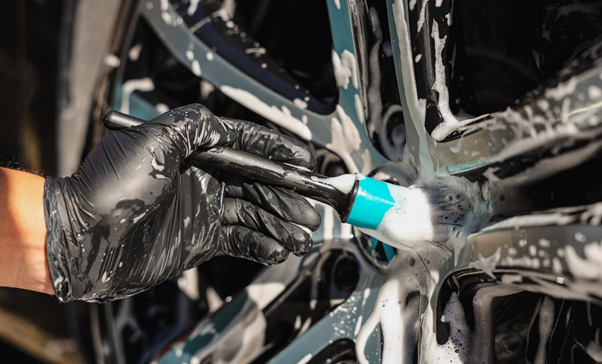
For the most intricate dirt traps around the wheel, such as cleaning around the
wheel bolts and between the tyre and rim, we opt for a scratch-free
Detailing Brush to agitate our solution. This accessory is ideal for
gaining access to the areas that your Barrel Brush and wash mitt
cannot reach. Once again, dip into the Revolution solution and apply liberally.
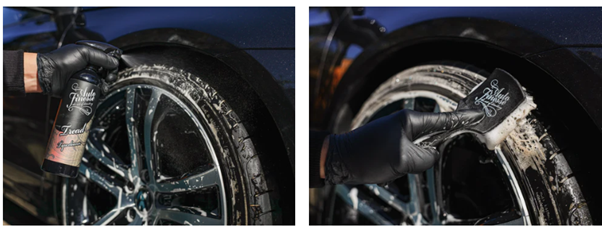
Before rinsing away our wheel cleaning agents, we can give them a little longer to work on the hardiest contamination while we clean the tyre and inner arch. Again, these tend to be extremely grimy areas which require a heavy hitting cleaning agent like Tread Tyre Cleaner.
Apply your Tread liberally over the sidewalls and plastic inner arches, and don't be concerned if there's a little overspray onto the wheels, this will not do any harm. Tyres and arches won't be damaged through scrubbing either, so we can agitate the solution vigorously using stiffer brushes designed to mechanically clean (or physically remove) the most ingrained grime. For sidewalls we use a Rubber Scrubber Tyre Brush, before moving on to an Arch Blaster Arch Brush (or a Barrel Brush) for the inner arches. When scrubbing these areas be careful to avoid any contact with the wheels or the paintwork.
Top Tip: When cleaning arches our go-to accessory would usually be an Arch Blaster but, if your car is lowered or has minimal clearance in the arches, you may have difficulty getting one in there. If this is the case, our backup option is always to use a Barrel Brush instead.
To finish we rinse the whole area thoroughly. By now all the
cleaning agents will be encapsulating the harmful contaminants, so this process
will ensure that they're fully removed from the vehicle. Once again, start with
the wheel, move on to the tyres and arches, and return to the wheel for a final
rinse down.
PRE WASH:
The pre wash stage has been described as the most important process by many a professional detailer. The purpose of this stage is to remove as much of the harmful grime and heavy particles as possible before we make any contact with the bodywork. If you skip the pre wash you risk inflicting defects by dragging these harmful particles across the more sensitive surfaces of your vehicle.
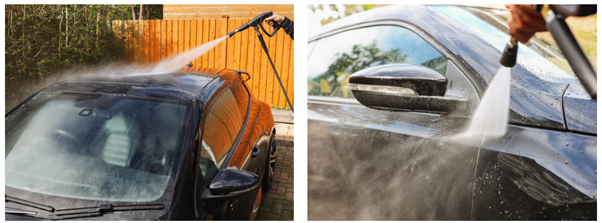
We start this stage by rinsing the whole vehicle with a pressure washer to remove any loose surface dirt. Once again this ensures that you're not wasting product on grime that can be easily removed, saving your cleaning agents for where they're needed most. Be sure to not only rinse down the exterior, but flush out any shuts and panel gaps, too.
We then go around the vehicle applying our pre-cleaner, we're using Citrus Power Bug & Grime Remover which is designed to lift and encapsulate the harmful particles without degrading previously-applied protection layers.
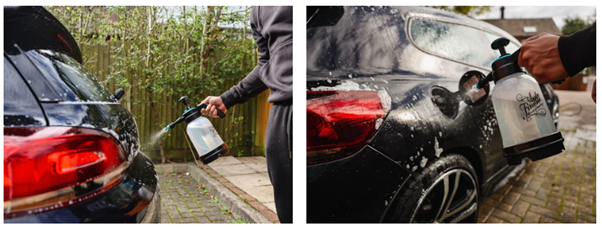
Citrus Power is supplied ready-to-use in 500ml and 1-litre triggered bottles, and in 5-litre trade size containers. We've chosen to make our lives easier by applying ours over the large area using a Pressure Sprayer, an option often preferred by trade professionals who complete multiple cars day in and day out.
Apply your Citrus Power over the whole vehicle, we recommend starting with the lower areas (which tend to be the dirtiest) to give the product a little more time to dwell. Leave your Citrus Power for around 3-5 minutes to get to work lifting the grime, the longer this product dwells the more grime it can trap in the solution, but never let it, or any other cleaning product, dry on the vehicle.
After sufficient dwelling, rinse the entire vehicle from the top down, being sure to remove any traces of product.
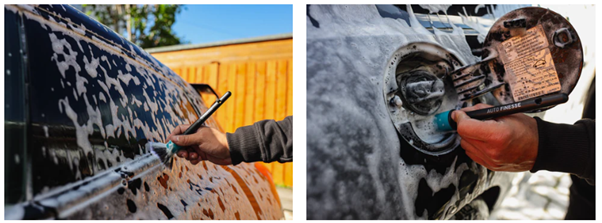
After rinsing, we can add more Citrus Power to the door jambs and boot shuts, along with other notorious dirt traps such as inside fuel filler flaps, and inner door bottoms, before agitating with a soft Detailing Brush. Unlike the exterior panels where we avoid any agitation these areas are generally safe to gently work in your cleaning agent. Once agitation is complete, rinse these areas thoroughly, and once again rinse the whole vehicle from top to bottom to ensure that all product is removed.
Top Tip: Make sure you keep an eye on the rest of the vehicle while you're agitating to make certain it doesn't dry out. If necessary, always stop what you're doing and mist some water over the whole vehicle using your pressure washer to make sure it stays wet.

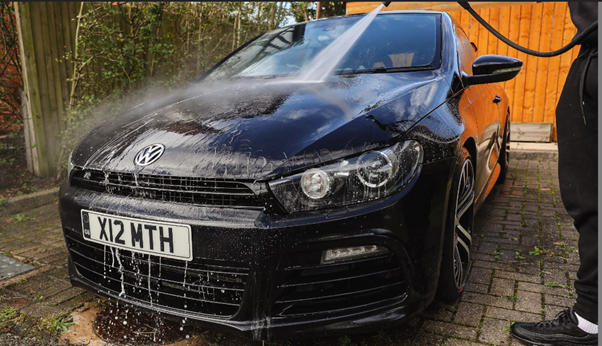
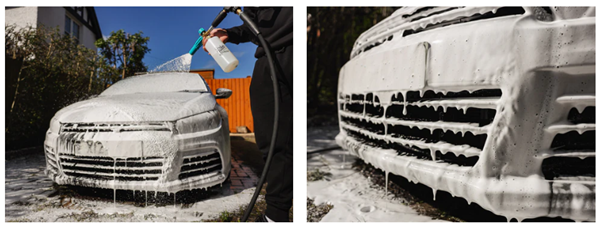
Once all traces of Citrus Power solution and grime is removed, we can move onto the snow foam stage. Snow foam is always the second part of any pre wash, the idea is to apply a thick, lingering foam which dwells on the vehicle for as long as possible to break down even more bonded contamination. Avalanche Snow Foam is a citrus-infused product that's safe on waxes, sealants and ceramic coatings, and designed to work its way into panel gaps and crevices, ensuring that all areas receive contact with the powerful surfactants it contains.
Add 1-2 inches of Avalanche to your Foam Lance Bottle and top up with clean water. You can fill slowly with a tap but a good tip is to dip the bottle into a bucket of clean water, to help avoid it foaming up prematurely.
Apply your Avalanche over the entire vehicle, including the wheels, working from the top down. There's a common misconception in detailing that bottom-up application is best for snow foams, but in reality, this risks dragging the heavier soiling usually found on the lower areas upwards to cleaner parts of the vehicle. For this reason, we always recommend applying snow foam from the top.
Because the missed harmful gritty particles will have been removed earlier with your pre-cleaner, Avalanche Snow Foam can be lightly agitated, to ensure maximum contact, on targeted dirt traps around the vehicle. For this process we always opt for a super-soft Feather Tip brush to work on intricate areas such as grilles, headlights, rubbers and weather strips. However, if you are using Avalanche Snow foam as your only pre-cleaner we advise against agitating.
Snow foam is designed to be left to dwell for as long as possible before rinsing, but even so, never let it dry naturally. A good professional tip is to keep an eye on the windows, as these tend to dry out first. Once the windows start to dry out it's time to rinse the vehicle from the top down, being sure to flush out any panel gaps and shuts. Once all traces of foam are removed, that's your essential pre wash complete.
CONTACT WASH:
As this specific vehicle has been protected using our Caramics range of exterior ceramic coatings (Paintwork, Glass and Wheels) within the last six months, we can opt for our Caramics Enhancing Shampoo for the contact wash stage. This product is designed to clean surfaces, just as you'd expect, but it's also infused with an Si02-based coating designed to boost the life and performance of any previously-applied ceramic protection.
When a wax or sealant has been applied previously (or if we don't know the history of the vehicle), instead we'd opt for Lather Car Shampoo, which is a pure cleaner that contains no waxes, coatings or shining agents. This detailing staple is safe to use on all protection layers, including ceramic coatings, when boosting protection isn't desired. Both Lather Car Shampoo and Caramics Enhancing Shampoo are dilute-to-suit products, meaning that you can simply add a little more to your Detailing Bucket for the heaviest soiling, and a bit less for lighter soiling.
Here we add around 4-5 capfuls of our shampoo to a Detailing Bucket that's three quarters full of water, before topping up with our pressure washer.
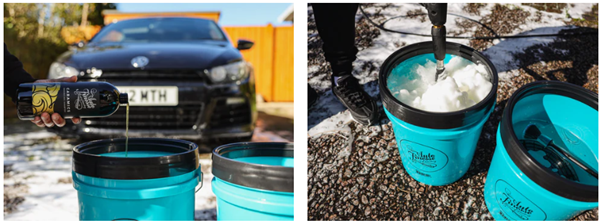
It's essential to use the two-bucket method when performing any contact wash. This is where you have one bucket for your wash solution, and another bucket containing nothing but plain water for rinsing out your mitt after every pass. These should be completely separate from the bucket that you use to clean your wheels. We recommend labelling each bucket to ensure they're used for the same task every time you detail.
Professional wash mitts - like the Ultra Plush Wash Mitt we're using here - are designed to glide across surfaces picking up particles and trapping them deep within their microfibre or lambswool material. By using the two-bucket method you're ensuring that these contaminants are rinsed out of the mitt before moving back to your wash solution. This not only cuts down the risk of cross contamination of your shampoo solution, but ensures that the particles aren't dragged back onto the vehicle where they could cause defects.
Another crucial safety measure used during the contact wash is to clean the areas that are more likely to be lightly soiled first. Again, this cuts down the risk of dragging heavier particles to cleaner areas of the vehicle.
Starting with the roof, we load up on shampoo solution and pass our mitt over the surface, cleaning approximately half the area, before turning over the mitt and completing the remainder. We always wash in straight lines, rather than circular motions, to further cut down the risk of inflicting swirl marks.
After rinsing and reloading your mitt, you can turn your attention to the windscreen and bonnet, following the same process of using each side of your mitt for approximately half a panel.
Next, we move to the upper sides of the vehicle - usually the top half of the doors, pillars and side windows.
Top Tip: Most cars have what we call a "design line' halfway down the doors or so which gives a good indication on where you wash to when cleaning your upper sides. Generally speaking, anywhere below this line will be more heavily soiled and classed as the lower sides. It's a good idea to use a separate mitt on these areas, and leave them until last, to prevent contaminating any wash media you may use on the uppers or dragging any dirt upwards and around your paintwork.
Once the upper sides are compete, we can set to work on the front bumper and grille.
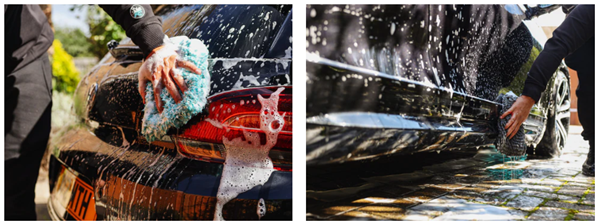
The rear end is usually one of the most soiled parts of any vehicle, so we leave this as one of the last stages. We start by cleaning the top portion with our Ultra Plush Mitt, and then move on to the bottom portion, followed by the lower sides, using a dedicated mitt. In this case we're using a Noodle Mitt for the dirtiest areas, which is great for trapping heavy grime and working its way into the more intricate parts like around side skirts and exhausts.
Finally, to complete the contact wash, we can rinse the
vehicle thoroughly from the top down.
TOPPING UP CERAMIC PROTECTION
This is, of course, an optional step and one that's only performed on vehicles with a previously-applied ceramic coating or no protection at all. When topping up other protection layers, such as waxes or paint sealants, this should always be carried out after drying the vehicle.
Ceramic coatings are unique because they use silicon dioxide (otherwise known as silica) to chemically bond to surfaces and create a glass-like layer of gloss and durable protection. These can be topped up or installed during the wash stages, while the vehicle is still wet, using Lavish Ceramic Foam.
Lavish is designed for easy application using your Snow Foam Lance. This product is a simple spray-on-and-rinse formula to boost the life and performance of paintwork, glass and wheel coatings. It's so powerful in fact, that it can install a coating on its own that repels water and grime for up to 6-months.
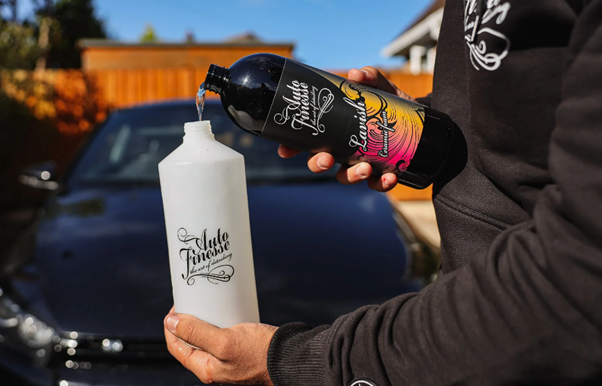
First add 2-3 inches of Lavish concentrate to your Foam
Lance bottle and top up with water.
We then apply the Lavish to the entire vehicle. This product bonds instantly so
there's no need to leave it to dwell. Instead rinse off immediately, ensuring
that all the foam is removed. And that's your top up complete - it really is
that easy.

DRYING:
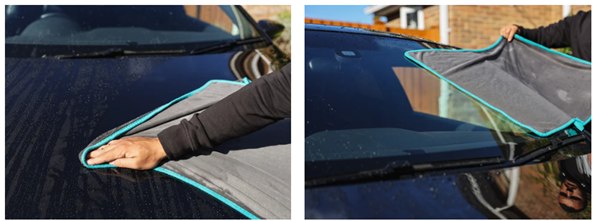
The drying stage may be simple but it's no less vital. Regardless of the type of detail you're carrying out it's essential to dry any vehicle after washing to avoid water impurities being left on the exterior surfaces. Rather than trying to push the water off the surface, the only safe way is to dry through absorption, soaking it up (along with any impurities) using a microfibre drying towel. In this case we've opted for our Silk Dying Towel for sheer speed, but the towel you use is down to personal preference, we also have our ultra-absorbent Aqua Deluxe Drying Towel, and a larger version called the Aqua Deluxe XL.
When it comes to effective drying, it's important to let the towel do all the work. Pass it over the vehicle without any pressure to cut out the risk of causing any swirling. Start with the roof and glass, before moving onto the bodywork, drying from the top down.
Be cautious of any missed grime on lower areas of the vehicle and, of course, always avoid the towel making any contact with the floor. If your drying towel does happen to touch the ground, our advice would be to dispose of it and not to use it again. In our eyes it's really not worth the risk of inflicting any damage to your paint from grit that may have been picked up.
Once the bodywork is dry you can then proceed to drying your wheels, along with the door jambs and boot shuts. You can use your drying towel for this job, but to eliminate any risk of dragging your towel across the floor, we recommend swapping to a smaller microfibre cloth to complete the drying process. Our Ultra Plush Microfibre is our product of choice here because it's far more absorbent than any other standard-size microfibre.